Toolkit for Artful Disclosure: Collecting, Visualizing, and Celebrating Women’s Stories
Learn how to implement Artful Disclosure in your own community or organization. This toolkit offers guidelines for instructors on facilitating the three major components of Artful Disclosure: Interviewing, art creation, and exhibition. It also provides a wide range of sample lesson plans and participant instructions.
What Is Artful Disclosure
Starting in 1997, educators Barbara Rosenblit and Sheila Miller collaborated on a course in which high school students collected life stories of older Jewish women and translated those interviews into the language of visual art. Each year, students used a different visual form as the base for their art, which included painting, collage, assemblage, and text art. One year the art work might take the form of a hat; another year, a handbag. The course's culmination was a public exhibition that brought the community together to celebrate the artists and subjects alike.
With the support of the Covenant Foundation and in partnership with the Jewish Women’s Archive, Miller and Rosenblit adapted their original high school curriculum to serve adult groups. The curriculum has three fundamental parts:
- Life history: Introduce participants to the principles of oral history interviewing and have them interview someone in their family, community, or organization. These interviews can be intergenerational or peer-to-peer.
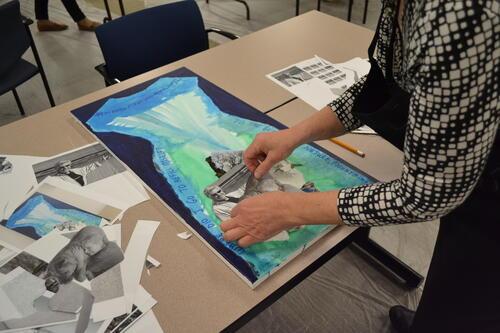
- Art creation: Gather participants together again, bringing the art form and materials they will be using. Guide them in the basics of collage and text art. Have them create artworks that represent the people they interviewed.
- Public celebration: Arrange for the display of the completed artworks and a reception for the artists, their muses, and the community.
Each of these elements can be adapted to suit the needs of the group in question; this toolkit offers several examples of different assignments for different groups. Artful Disclosure is adaptable to classrooms and boardrooms, to small community groups and large organizations, to any group with a desire to create connections.
A sample schedule might involve an initial workshop on story collecting/oral history interviewing; a second session in which participants debrief their experiences conducting the interviews; one or two workshops dedicated to art making; and finally, an exhibition of participants’ work that is open to the community. However, the model is flexible for both shorter and longer timeframes.
To learn more about the history of Artful Disclosure, watch the video below.
Purpose of the Toolkit
This toolkit has two main components. The first offers guidelines for instructors on facilitating the three major parts of Artful Disclosure: Interviewing, art creation, and exhibition. The second provides a wide range of sample lesson plans and participant instructions. Together, these components provide the tools educators need to implement Artful Disclosure in their own communities or organizations.
Artful Disclosure Toolkit Part I: Interviewing, Art Creation, and Exhibition
Tool 1: Interviewing
We begin with teaching how to interview, skills that teach patience, listening, curiosity, and the ability to be surprised. Interviewing tools can be used either with intergenerational groups or for projects tailored to adult organizations and institutions. We begin the interviewing process by asking both interviewers and their subjects to prepare ahead of time. We have found that the more formal the process, the more substantial the outcome.
Some examples of interview pairs could be: novices in a certain field and their mentors interviewing each other; mothers and adult daughters; paired members of political groups, sisterhoods, board members, professional organizations, etc. Interviewing skills are useful in every case, helping us learn to listen, to connect, and to open ourselves to surprise.
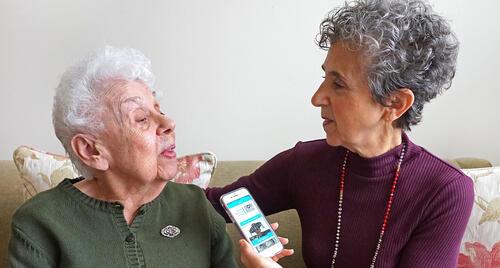
JWA offers several practical tools and guides for conducting interviews. Story Aperture, a story collecting initiative and mobile app, makes it easy to record interviews. In Our Own Voices, an oral history introduction and manual by Jayne K. Guberman, includes suggested interview questions. JWA’s Family History Toolkit also offers useful guidelines for conducting oral history interviews.
A Few Tips:
- We suggest interviews be formally requested and a time and place arranged in advance. Invite the interview subject to bring albums or memorabilia along. If adult groups are interviewing each other in a common space and time, be sure there is room for privacy for the pairs.
- Send some questions ahead of time so the subject can choose which questions they’d most like to dive into. These Twenty Questions are a good option.
- Taping the interview on your phone using Story Aperture or Voice Memo makes the recording process effortless. Whatever recording method you are using, test ahead of time to ensure you know how to record and save the conversation.
- Start the interview with an introduction: “Today is (date). My name is (your name), and I am interviewing (narrator’s name), who was born on (date of birth) in (place of birth). (Narrator’s name), do I have your permission to record this interview [and submit it to the Jewish Women’s Archive]?”
- You don’t need to ask every question you prepared. Choose what is meaningful or of interest to you and your narrator. Listen attentively and ask follow-up questions as you go.
- Avoid interrupting your narrator while she is in the middle of a story or asking leading questions. Allow for pauses and use open-ended questions to elicit more information.
- Avoid making verbal affirmations like “uh huh” or “oh, wow,” because they can interrupt the narration. Instead show your appreciation or understanding through eye contact, facial expressions, and other non-verbal signs.
- When she’s finished, thank your narrator for her time and for sharing her story with you. Send a written thank you note soon afterward.
- If applicable, invite participants to submit their interviews to JWA through the Story Aperture initiative.
For more detailed information on interviewing best practices, watch Unlocking the Power of Oral History .
Tool 2: Reflecting on the Interview and Choosing a Theme
Once the interview is completed, it’s important to distill it. You can begin by reflecting as a group on the experience itself and the surprises that surfaced. This group brainstorming session can also be a catalyst for generating visual ideas.
Simple prompts to generate this initial distillation include:
- Is there a particular experience from the interview you want to share?
- What did you learn that surprised you?
- Write down at least ten words that describe the person you interviewed. Now write ten more words. Pick five words from your list that best describe the subject.
- Discuss your list with a partner or small group
- Can you identify a turning point that shaped your interviewee’s life?
- Is there an overarching theme that emerged from the interview?
- Encourage each participant to develop a theme for her artwork to help visually portray the subject. Examples include: courage, achievement, career, innovation, family, leadership, activism, heritage, resilience, risk-taking, fear, fearlessness, loss, serendipity, etc.
Tool 3: Selecting the Art Form
The art form you select will depend on time, materials, budget, available studio space, and the size of the exhibition space in which the pieces will be displayed. We recommend using a mixed-media art form. Mixed-media refers to an artwork in which more than one medium or material is used. Materials might include (but are not limited to) paint, cloth, paper, wood, and found objects. (Note: In Part II of this Toolkit, you will find links to instructional guides and visual examples of nine mixed-media options you might consider.)
In our experience, mixed-media art forms are relatively approachable for participants who are not, by training, artists. This accessibility is important because artmaking can be intimidating to many adults. Traditional forms such as painting, drawing, or sculpture can feel daunting and inspire fear of judgment or criticism. By bringing novice art-makers into a studio space filled with a wide range of materials, we invite them to play, to imagine, to experiment with familiar and unfamiliar objects. Therefore, all the projects in Artful Disclosure involve assembling a variety of materials. Using mixed-media forms invites the use of juxtaposition and a variety of materials to open expressive doors.
Choices can range from simple word art to complex multi-media canvases. Over the years, we have experimented with nine different art forms, all under the category of mixed-media. The possibilities are as broad as your imagination (and budget for time and materials and exhibition space) can take you!
Tool 4: Preparing Participants for Studio Work
Once you’ve chosen the art form, participants can begin to translate their stories into visual language.
These steps can help:
- Have participants free associate to generate lists of symbols, colors, textures, and ideas for the composition. Let them sketch out ideas and feel free to talk to others about what they’re thinking.
- Encourage participants to find metaphors. Artists use metaphors to evoke connections. Consider gardens, barren or lush landscapes, high rise or dilapidated buildings, winding or unpaved roadways, waterscapes, trains and bridges, as well as embedded texts, to help provide visual vocabulary to support a selected theme.
- Invite participants to bring materials of their own or from their interviewees that might become part of their art, including the wealth of ephemera squirreled away in the back of drawers and dusty boxes, including:
- Three-dimensional objects, e.g., costume jewelry, watches, pins, buttons, a favorite book, postcards, a pair of glasses, a treasured letter, etc.
- Photographs, recipes, maps, passports, fabric, picture frames, or other artifacts can be incorporated to enrich the visual story. Photocopied images can be resized and manipulated and are a good source for historical or architectural touchstones. Archival photos can be photocopied onto acetate transparency sheets. Layering acetate images atop other materials can suggest how events can overshadow or underpin each other.
- Printed or handwritten texts, including words, phrases, quotes, or poems, can amplify the personality or character of the piece.
Tool 5: Facilitating Studio Work
The studio work environment should be inviting, full of materials, and conducive to focus.
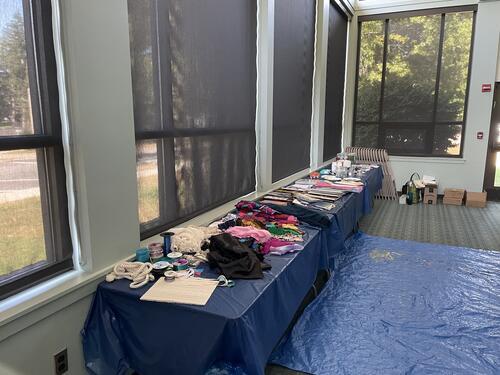
Supplying Materials: Depending on the selected artform, general supplies might include: scissors, pens (including metallic pens in silver and gold), pencils and colored pencils, sketch paper, handmade papers, photocopier acetate paper, fabric scraps, lace, magazines or old dictionaries for collage, Mod Podge glue, yarn, paint and brushes. Consider decorative art supplies and materials from art and craft stores like Michael’s or Joann’s. Buy Nothing groups can be wonderful sources for old magazines, books, and fabric scraps.
We suggest opening the artmaking workshop with a short introduction to the idea of mixed-media art:
Stress to the group that materials have inherent meanings. Feathers are soft and ethereal, metal and wire are hard and unyielding, muslin can create a sheer veneer clouding a forgotten story, a coil of golden thread can weave through an otherwise barren background. Sheet music, pearls, buttons, hand-made papers, dice, old maps, cropped archival images from the internet, old photographs—the list is long—all hold meaning, both for the artist and the viewer. Have all materials displayed and available. The more options, the more ideas.
Show contemporary artists. Show the group a few examples of professional artists’ work. Noticing how professional artists work with a variety of materials in creative ways invites divergent thinking. Consider, for example, Joseph Cornell’s use of shadowboxes, Judy Chicago’s use of dinner table settings with accompanying banners and goblets, Alexander McQueen’s use of mixed-media dress forms, Barbara Kruger’s text-based panels, or Andy Warhol’s portraiture. The internet offers a treasure trove of choices to explore any given form.
Begin! Invite participants to explore the materials you’ve supplied. Make sure to build in time for sketching and experimenting. Circulate as they work, making sure you’re available for any questions. Give them at least a half-hour warning before the end of the workshop time. If possible, leave time for participants to present their art to the group.
Tool 6: Exhibition and Community Celebration
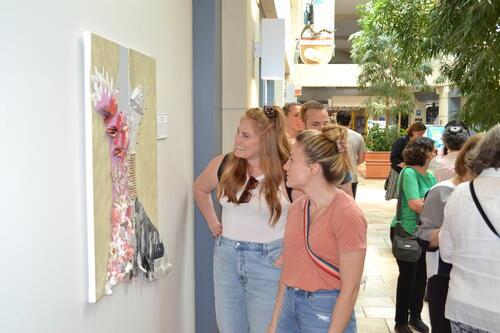
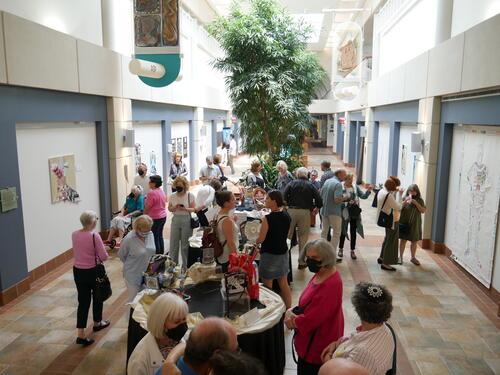
The power of an exhibition opening should not be underestimated. It gives value to the work and illuminates otherwise unseen lives and connections. Celebrating this work in a gallery-like setting elevates and honors the finished pieces, inviting unexpected conversations.
Tips for a Successful Exhibition:
Each piece should include an Artist Statement to give context to the finished work. The Artist Statement should include: the name of woman being honored, if applicable; the artist’s name; a title for the work; and a brief reflection on the artistic choices for the piece.
Celebratory exhibitions can be small undertakings or large community gatherings. In both cases, marketing matters. Digital and physical postcard invitations can raise interest. At the event itself, a panel discussion can enrich the afternoon gathering.
Artful Disclosure Toolkit Part II: Examples
Sample Artform Lesson Plan Sheets
The Toolkit offers a wide range of artistic options for your group. The list is meant to inspire your creativity but not limit it.
Each Artform Sheet includes:
- Artform
- Goals/Objectives
- Materials Needed (provided by the facilitator)
- Suggested inspiration sources to show participants
- Exhibition suggestions
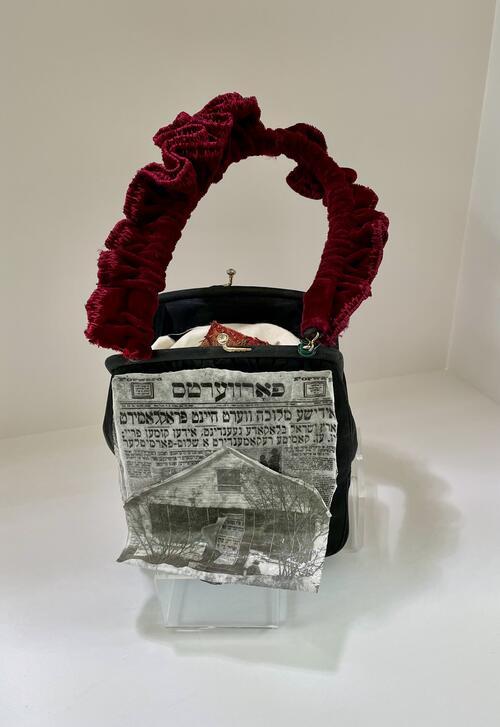
- Vintage Handbags
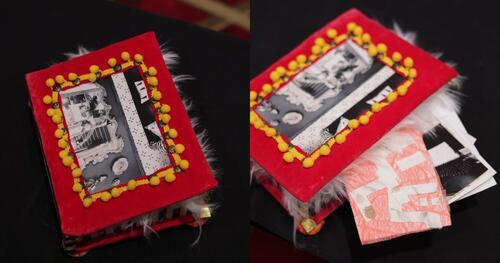
- Book Boxes
- Sculptural Books
- Repurposed Lamps
- Dress Forms
- Embroidery Hoops
- Ceramic Dinnerware
- Photos of Still Lives
- Text Art Figure
Detailed Plans for Four Workshops
Projects created for The Breman Museum, Jewish Family and Career Services of Atlanta, The Temple Rothschild Social Justice Initiative, and The Facilitators Workshop
Below are four examples of packets sent to participants in advance of their respective workshops. These allowed them to prepare for the projects they would be embarking upon. This preparation is essential for creating a meaningful and successful piece of art in the limited time of the workshops.
Each Preparatory Packet includes:
- Goals and Expectations
- Links to images of the art form
- Guided Questions for the participants to prepare before the first workshop
- Materials and personal items for participants to bring to the workshop
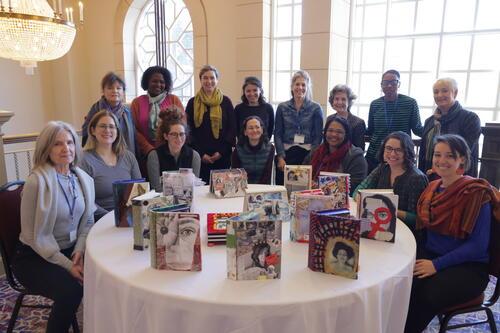
- At The Breman Museum of Jewish Heritage, a group of women focused on someone who had made an indelible mark on their lives.
- Artform: The art form was a vintage handbag or other receptable, like a hat box, a picnic hamper, a violin case, etc., used as a container for the artwork.
- Timing: This workshop took place on two consecutive Sunday afternoons, lasting a total of eight hours. Participants could take their pieces home to work on between sessions.
Breman Museum Preparatory Packet
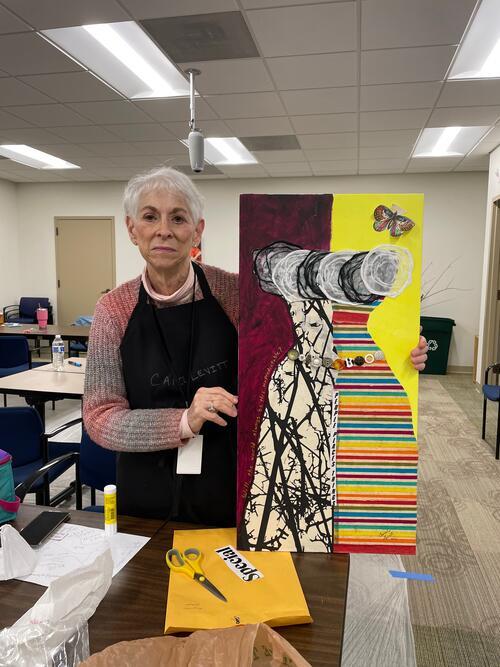
- At Jewish Family and Career Services of Atlanta, the counseling staff created mixed-media dress forms to express how Covid had impacted their lives and their therapeutic practice.
- Artform: We chose a mixed-media painting using the dress form, because clothing is a familiar but highly expressive and personal metaphor.
- Timing: This workshop took two afternoons, each session lasting four hours. It was part of what the staff supervisor called “self-care professional development.” The workshop was scheduled during the participants' workday.
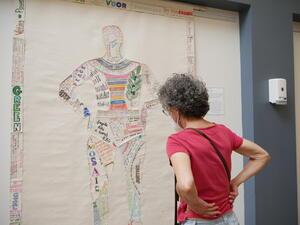
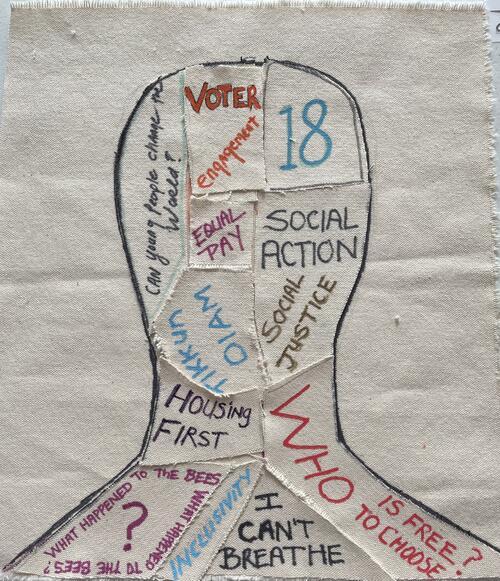
- At the Temple’s Rothschild Institute for Social Justice, 35 women who work on one of the Institute’s nine committees participated in completing a collective expression of their commitment to social activism.
- Artform: They used text art to animate a nine-foot canvas figure of a woman, subdivided into 35 body parts. Participants used text art on a “body part” to answer the query, “What draws you to social action and what keeps you engaged?” The result of this communal artwork was a monumental wall hanging of a woman, arms akimbo, declaring her resolve, showing the power of individual commitment when linked to communal purpose.
- Timing: This workshop took place during two and a half hours on a Sunday afternoon.
Artform Sheet - Text Art Figure
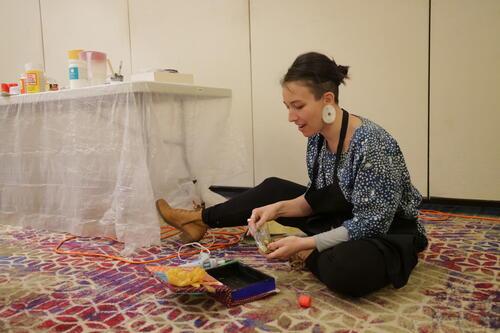
- At the Artful Disclosure Facilitators’ Workshop in Atlanta, ten organizational leaders from around the country learned how to facilitate a workshop uniquely tailored to their home institutions.
- Artform: Symbolic Portraits: Outside/Inside. The artform was an empty wooden box with a hinged top, a blank cover, and an empty interior. On the outside, participants explored their outer self and inside they used text art to express what sustains and drives them from inside.
